Budget Ideas for Raising Humidity for Indoor Plants – without Humidifiers
Welcome to our article for making a DIY humidifier for plants.
Let us know if this sounds familiar?
You see a stunning plant in the shops as you are walking by, and you think “That would look gorgeous in my home!”
You proudly position your plant in its place in your home, and it looks just as you pictured it. A living masterpiece!
You then realize Huh…how do you take care of this plant? Not to worry, good ol’ Google to the rescue!
Wait…what? This plant requires a humid environment!
Don’t worry – we’ve all been there.
There is an easy fix – you could buy a humidifier for your plant. But, it seems a bit over the top for one plant. Plus, they can be expensive and costly to run.

Lucky for you, we put our collective brains together at the Garden Bench Top, and created a list of ideas for making your own DIY humidifier for plants.
So, if you are ready to get your DIY on, let’s continue.
8 Ways to Increase Humidity for Plants without a Humidifier
1. Power in Numbers
One quick way of increasing humidity for your indoor plants is to group them together.

Did you know plants use their leaves to evaporate the water you have been so lovingly topping up every week? So, in a way, plants are their own humidifiers! Indoor plants achieve this through a process called stomata. By keeping a lot of plants in proximity to one another, their collective evaporation creates a self-made humid environment, keeping you and your plants happy.
This is often the simplest and quickest way of giving the immediate space a boost in humidity. Plus, it doesn’t cost you anything, except some time and maybe a bit of puzzle solving (trying to fit them all together in a way that is still visually appealing).
Of course, this won’t help if you only have one plant, or you may not have the space to fit a lot of plants together. Or maybe you just don’t want your living room looking like a jungle (no judgement if that’s your thing…).
Don’t worry if you fall into this category, we have a few more ways to increasing humidity for your plants without a costly humidifier.
2. Location Location Location

Sometimes placing your plants in naturally humid areas of the house can help keep your plants looking healthy and vibrant.
A great example of a naturally humid room, is your bathroom. Think about all those times your bathroom mirror has fogged up from the shower. Bathrooms are great for plants that love humidity and can tolerate warm environments. There is always someone in the family that loves a 45-minute hot shower!
Other places in your home you may consider placing your plant is the room or window where you usually dry your clothes. The evaporation from your clothes will help add moisture to the air, which will create a similar collective effect to the Power in Numbers strategy above.
3. A little Spritz Goes a Long way
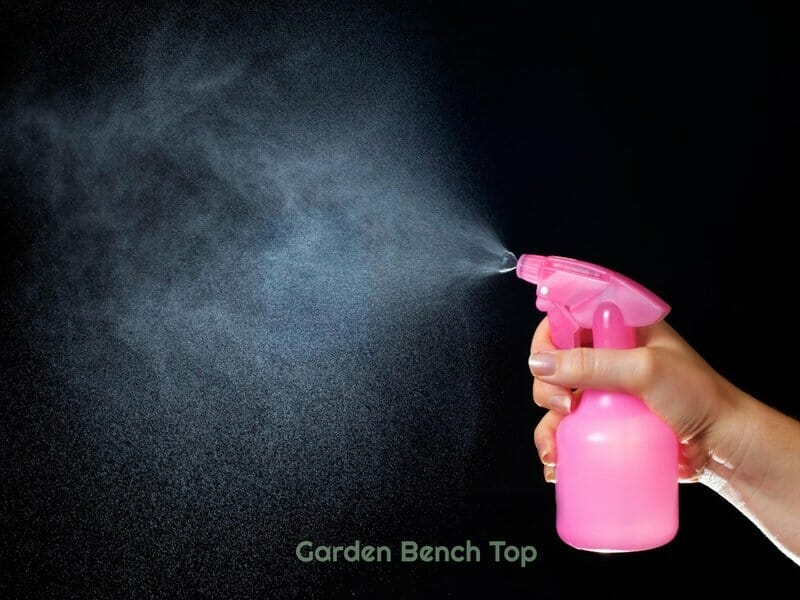
Lightly misting your plants in the morning and evening can sometimes be enough to keep your moisture levels high enough for your plants.
As you mist, the little droplets of water will settle on your plants leaves and the surfaces immediately surrounding your plants. Over the course of the next few hours, it will evaporate, helping to maintain your humidity levels.
Of course, there are pros and cons to this method. Misting is easy and budget friendly. However, it is a very manual process and requires your diligence in misting every day. This may not be a problem for those that do well with the husbandry responsibilities, but what happens when you go away for a vacation or work?
Also, misting your plants tends to get everything wet, including your plants’ leaves. Some plants are more susceptible to fungal infections and bacterial growth when wet, which is a whole other set of problems that is best avoided where possible.
4. Humidity Tray Wishing Well Concept
Have you ever noticed the air is more humid when you visit the lake or the beach? The reason is that large bodies of water provide a source of water vapor that fills the surrounding air.
We can use this concept and bring it into the home on a smaller scale, but with great effect on increasing humidity levels for our plants in your DIY humidifier for plants.

There are many ways you can replicate this concept. We like to use a humidity tray (or some people refer to it as a pebble tray). Here is the process of setting up your humidity tray:
- The idea is to get a large waterproof tray that is at least one inch deep.
- Fill the tray with pebbles that are roughly the same size. The consistency in size of your pebbles is important, because you will be balancing your plants on top of these pebbles. Pebbles of different sizes will cause your plants to tip and fall, which is a much worse outcome.
- Fill your tray with water, to the point where the tops of the pebbles are still exposed.
- Carefully balance your pot plant on top of the pebbles. Take your time here to make sure that your plant is properly balanced and secure.
Important Note – your pot plants should not touch the water. If they sit in water, the soil will absorb the water and will become waterlogged. This will lead to root rot which will be detrimental to your plants’ health.
5. DIY Humidity Chamber
Okay, so before you pass over this method because it sounds way too technical and involves fancy gadgets. Let us explain, because ‘humidity chambers‘ is just a fancy way of saying put your plants in an enclosed environment.
Humidity chambers are perfect for plants that thrive in high – humidity environments, like many tropical plants. They work by trapping natural water evaporation in an enclosed ecosystem.

Yes – you can go over the top and buy fancy humidity chambers, but it is just as easy to put together your own DIY humidity chamber.
Let’s take a look at how to begin constructing a humidity chamber for your plants:
- Find a clear plastic container that is large enough to house your plant(s). The sides of the container should be at least an inch away from any leaf of the plant. The container should also be sealable, to trap the moisture in the chamber. However, it should not be airtight, otherwise you may suffocate your plant.
- Place open cups of water in the chamber with your plant.
- Close the container and place it in a position that receives bright indirect sunlight. If you place it in direct sunlight, you may risk killing your plant as the temperature will increase quickly, and you will end up cooking your plant.
- You can speed up the process in your chamber by misting your plant and container before sealing it.
6. DIY Humidity Dome
An alternative to using a hard container is creating what we like to refer to as a DIY Humidity Dome. This uses the same concept as the chamber, but is a simpler version. To create a humidity dome or humidity tent, you will essentially need a clear plastic bag that is big enough to cover your plant.
You can follow the instructions (below) set out by the girls at The Jungle Upstairs to create a DIY humidity tent / dome.
Things to note:
When you are creating your own DIY humidity chamber or dome, always make sure the leaves of the plant are well clear from the sides. If the leaves touch the sides, they will eventually get wet from the droplets of water collecting on the sides, which can lead to fungal and bacterial growth problems.
You will also want to let the plant breathe every now and again. We recommend letting in some fresh air every other day to allow for proper gas exchange.
7. Oil Diffuser (without the oils)

This idea is actually from one of our readers, who wrote in and told us about how she was able to achieve the perfect humidity using an oil diffuser.
We thought it was genius, because it is essentially a miniature version of a humidifier, only cheaper and not as odd looking in the room.
The idea is simple. Operate an oil diffuser right next to your plant. Simply omit the essential oils and keep topping up your diffuser when the water runs out.
There are obvious limitations to using this method, like having to top up the diffuser quite frequently depending on the quality and speed that it diffuses the water. Plus, you won’t be able to operate it when you go on holidays.
That said, we thought it was well worth mentioning for those that are able to use this method to increase humidity for their plants.
8. Double (No)Trouble (Two Pot Method)
The Two Pot method is a popular way to increase humidity for plants, because it is less intrusive and doesn’t interrupt the look of the room.
This method is similar to Number 4 (the humidity tray), because it uses the same concept, just more discretely.
To implement the Two Pot Method, find a planter that has no drainage holes and is larger than the pot your plant is currently in. We always try to find pots that are only slightly bigger than the current pot, so the plant doesn’t look odd or too disproportionate to the larger container.
Place a layer of pebbles (roughly the same size) on the bottom of the planter and top up with water. You could use sphagnum or peat moss, but we find this can lead to issues with root rot as it tends to get in contact with the soil via the drainage holes.
Again, you want to ensure your planter is never touching the water to prevent root rot.
Frequently Asked Questions
In this section we attempt to answer all your ‘other’ questions that may not be addressed in the care guide.
Keep in mind, if you don’t find an answer to your question, please send us a message via our CONTACT page. We will endeavor to respond with a timely answer, and include it in our growing FAQ section below.
How do you check the humidity in your room?
You can use a hygrometer (which are smart devices and affordable devices) to measure the relative air humidity in your home. To find out how much water vapor is present in the air, you need to know its temperature and pressure. Hygrometers work by using these two measures and determine the point at which water vapor condenses out of air.
How to tell if your plants need higher humidity?
There are some telling signs a plant will give when it is deprived of the optimal indoor humidity for houseplants. And the first parts of the plant to display symptoms are the leaves.

Some symptoms include the leaves beginning to turn brown along the edges. And if you touch these parts, they will feel crispy and fragile, as opposed to healthy and lush.
The leaves may also begin to droop and wilt. And in some extreme cases, the leaves will fall off the plant. If it has reached this point, your plant requires immediate attention.
Is too much humidity detrimental to indoor plants?
This question is a bit hard to answer – the reason being it will depend on the type of plant you keep in your home.
For instance, cacti and succulents mostly originate from dry environments. Therefore, high levels of humidity may lead to issues with the way cacti naturally live. High humidity can cause fungal problems for cacti, which in the end will lead to their demise.
On the other end of the scale, tropical indoor plants love humidity. They thrive in it, and will often suffer if they don’t receive enough humidity.
Our advice is to try to stick to one particular plant type. It is far easier to keep all your indoor plants happy if they enjoy the same level of humidity.
Do Houseplants Increase Humidity in your house?
If you have read this far into our article, you may already know the answer to this question.
Yes – houseplants do most certainly increase the humidity in your house. It is for a variety of reasons, but the predominant reason is that you are constantly watering your plants. And through a process of stomata, the houseplants evaporate water from their leaves into the surrounding atmosphere.