Bring Your Orchid Back to Life with an Easy Garlic Tonic – EASY TO MAKE AT HOME!

Orchids are elegant and delicate plants that can sometimes show signs of struggle, especially when their growing conditions aren’t quite right. If you’ve ever inherited a sickly orchid or found one wilting on your windowsill, you’re not alone. Today, I’ll share a special project where I revive an orchid that originally belonged to my mum, using a natural and powerful remedy: a garlic tonic. This simple, homemade solution taps into garlic’s antifungal and pest-repelling properties to nurse the orchid back to health.
Assessing the Orchid’s Condition
Before jumping into treatment, it’s essential to carefully examine the orchid to understand what’s going wrong. In this case, the orchid’s flowers have dried up completely, and the flower stems are wilting and turning yellow.
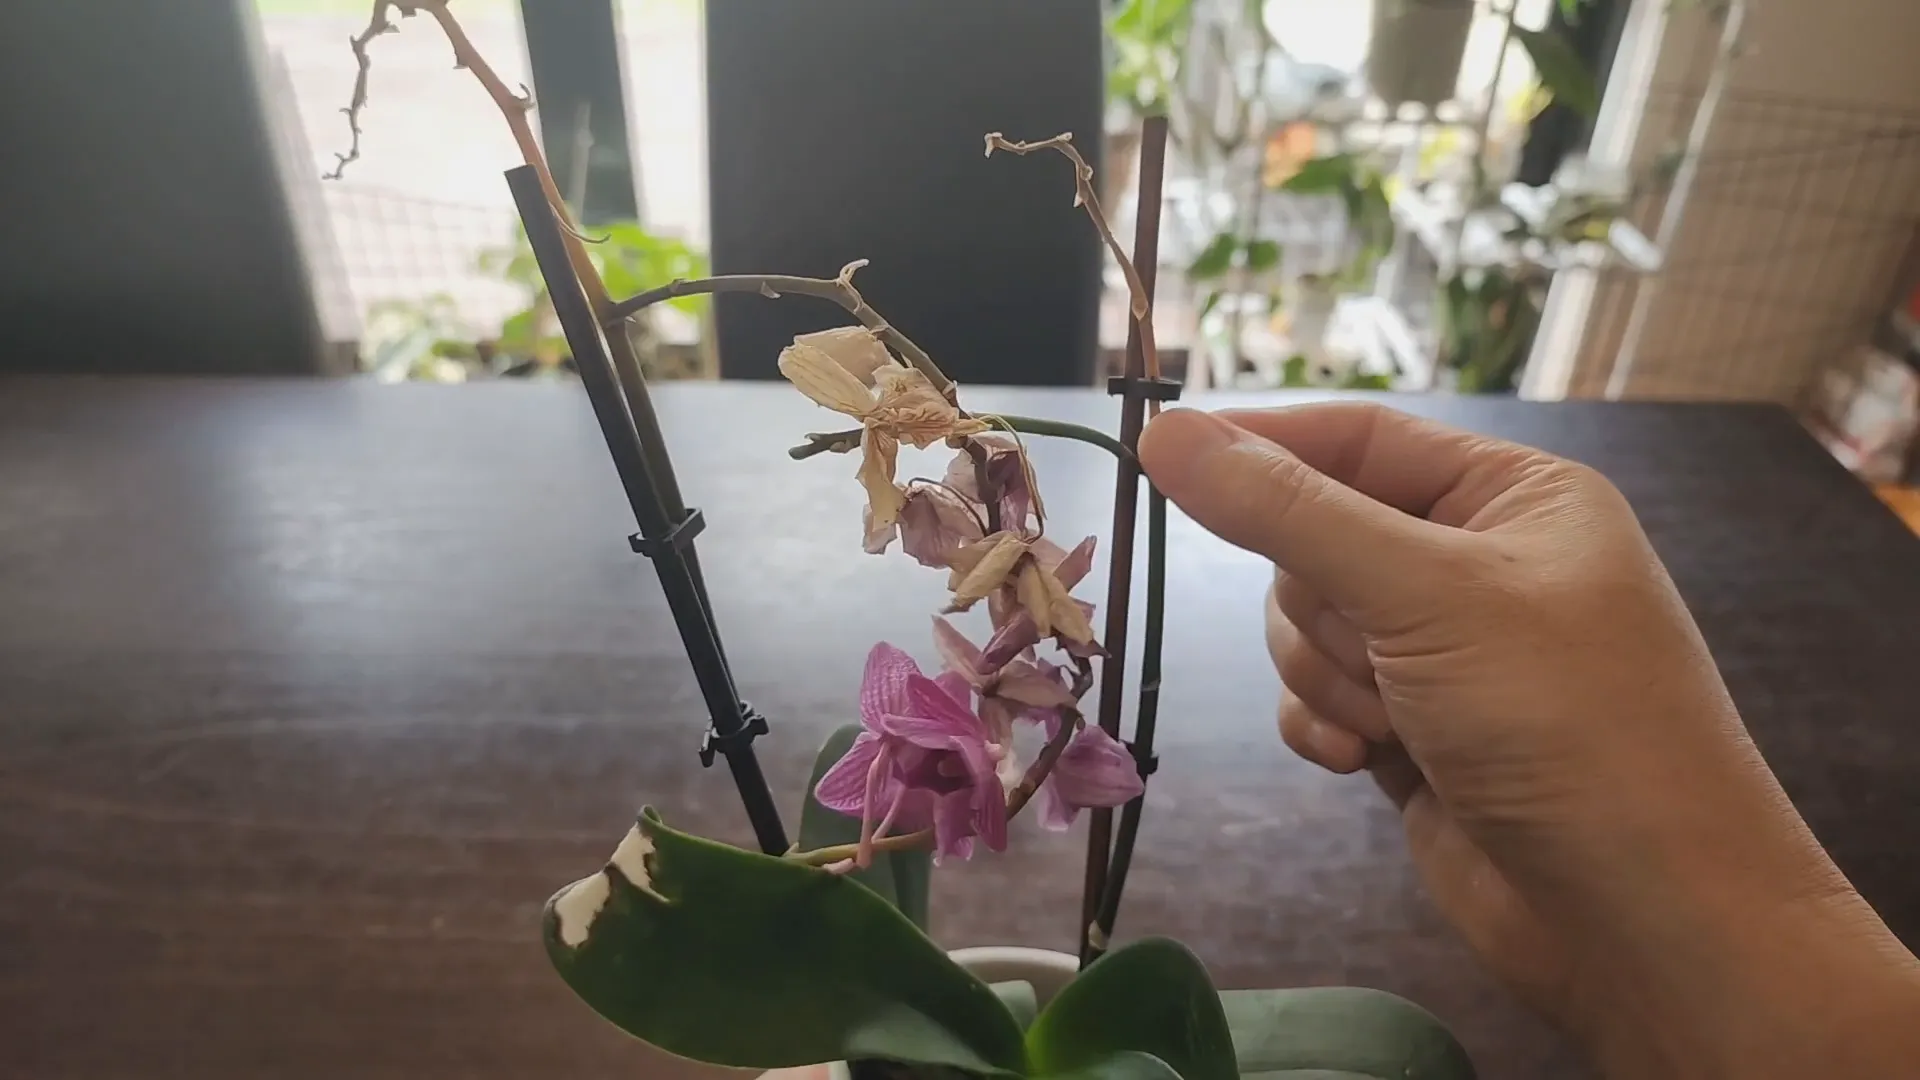
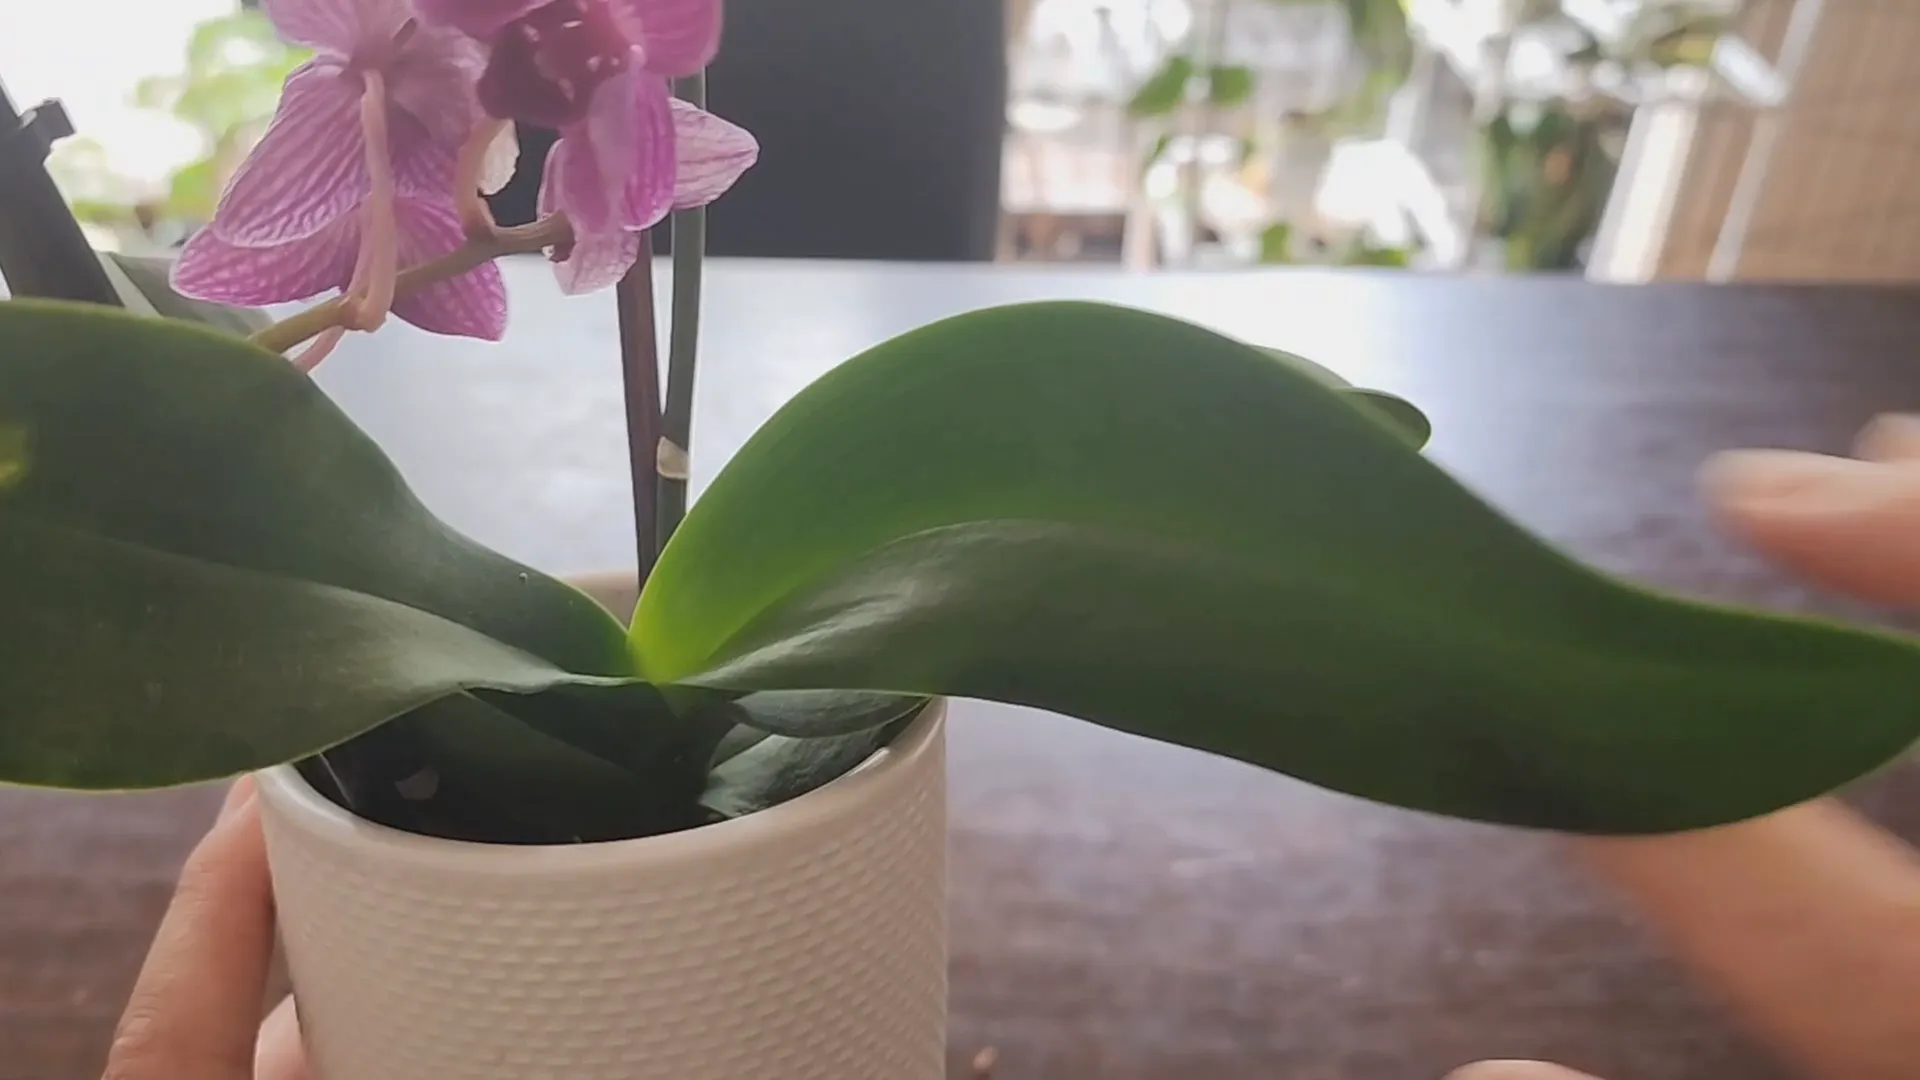
Taking a closer look at the leaves reveals another issue—they’re covered in dust. Dust acts like a barrier, blocking sunlight and hindering photosynthesis, which is vital for the plant’s energy production. So, a thorough leaf wash is the first step to help the orchid breathe.
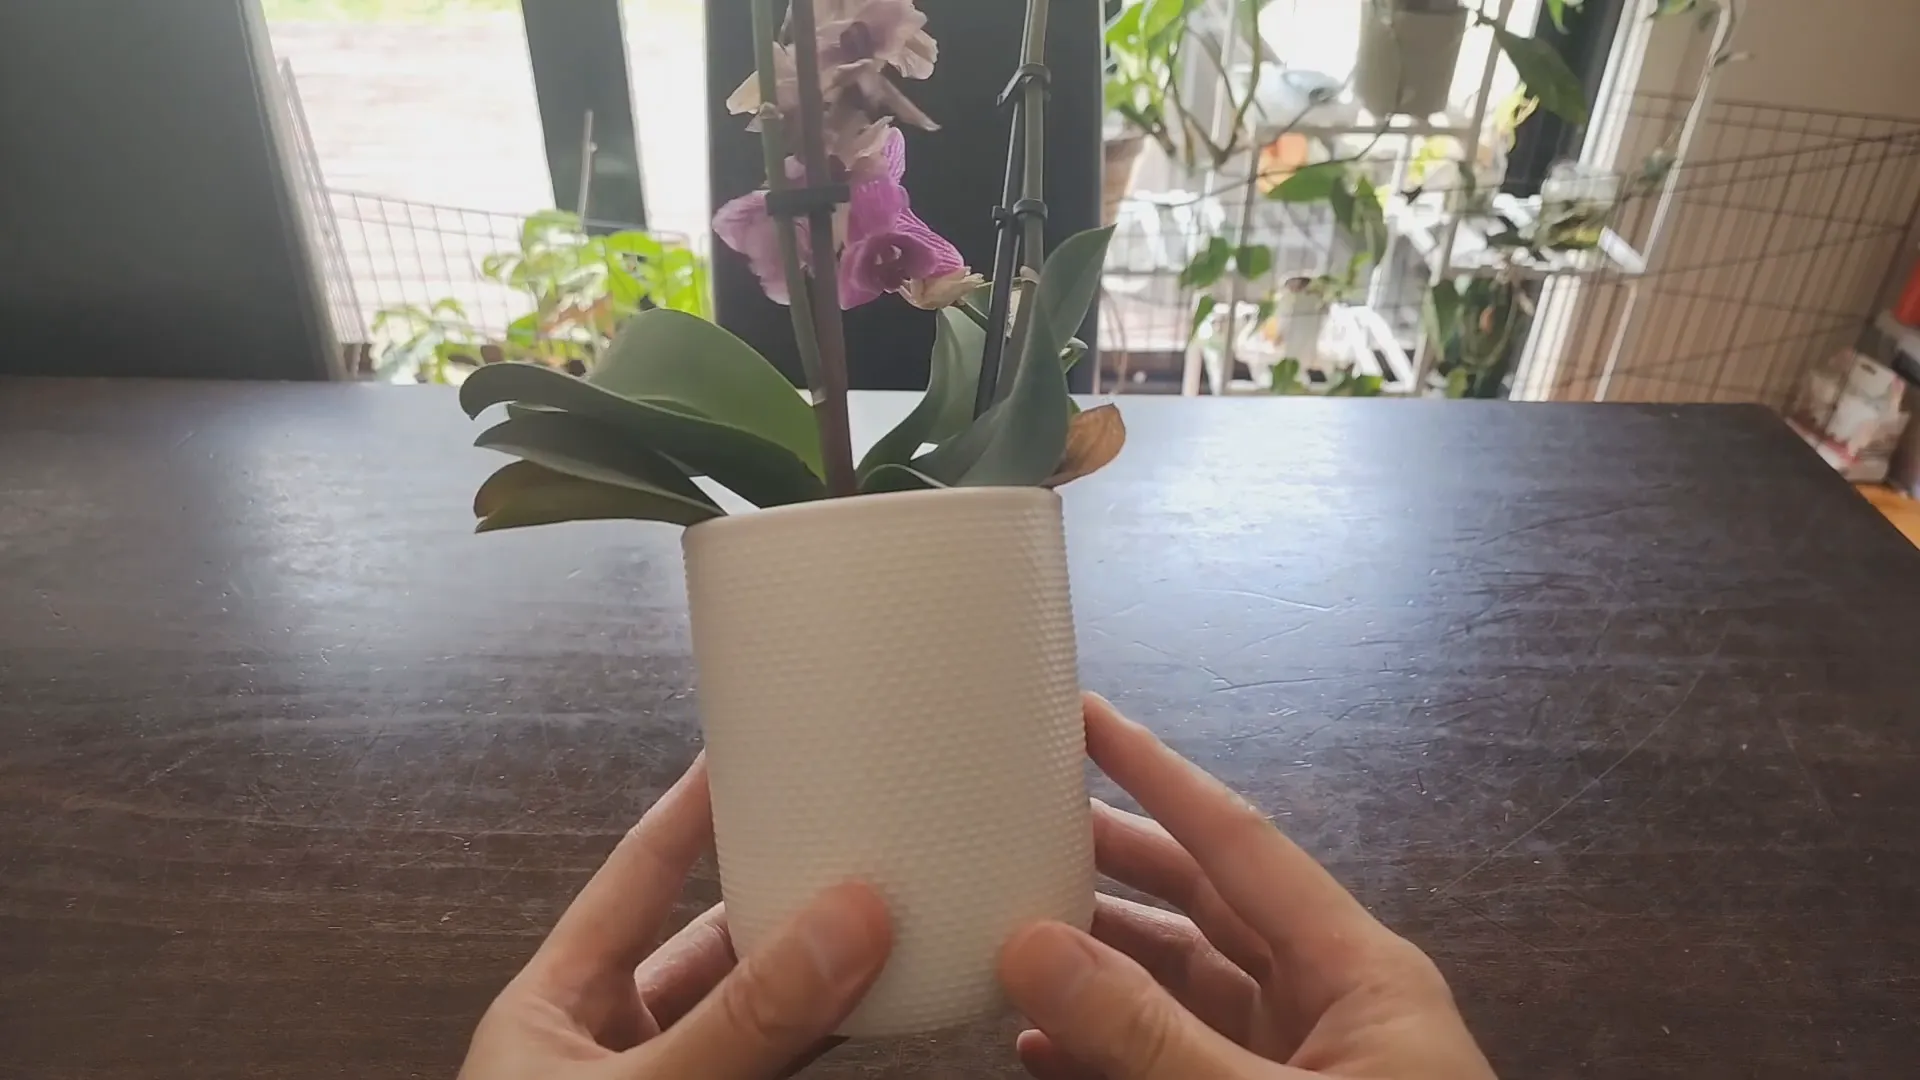
Next, the orchid’s pot is a common supermarket ceramic pot without drainage holes. While visually pleasing, this type of pot can do more harm than good because orchids need excellent drainage to prevent root rot.
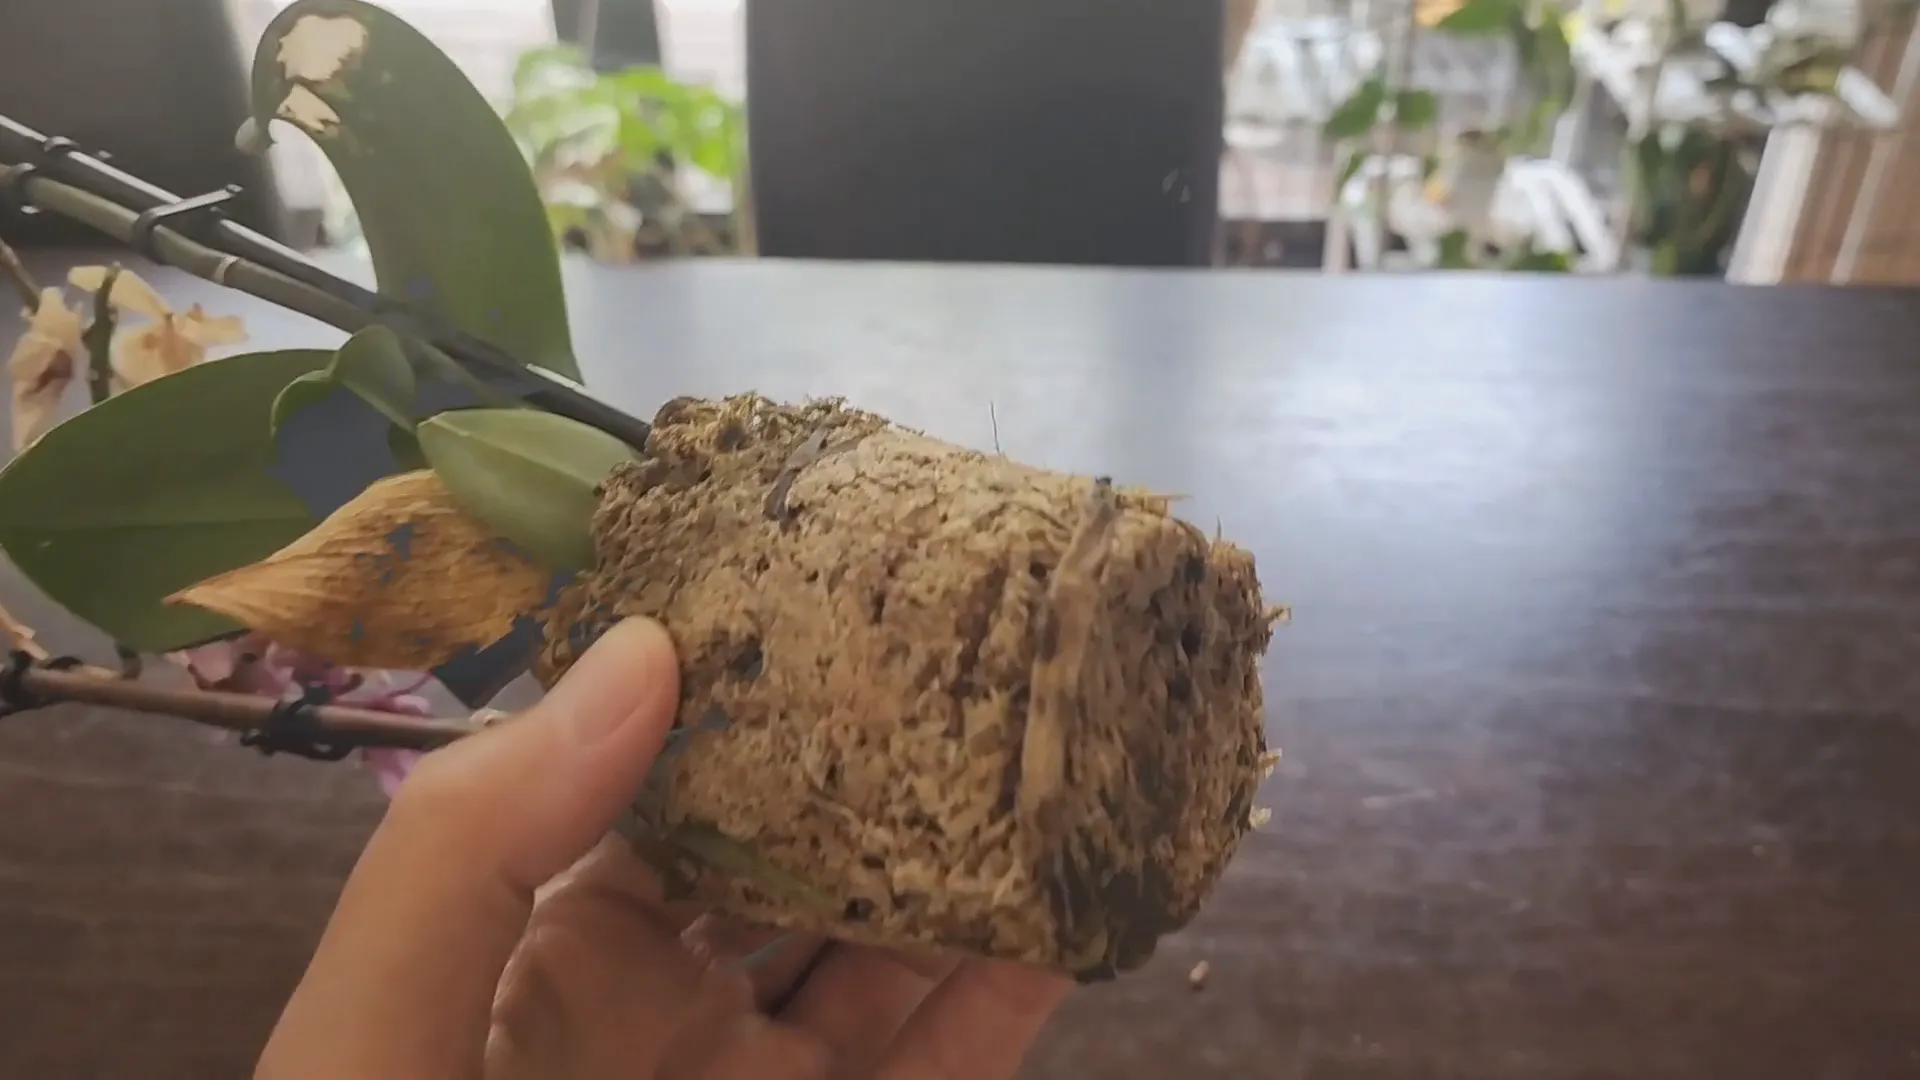
Unfortunately, the roots show clear signs of rot, with mold and bacterial growth present. They’re surrounded by wet sphagnum moss, which tends to hold too much moisture, suffocating the roots. Additionally, some leaves are yellowing, and one leaf even shows early fungal infection signs. These symptoms are common when an orchid is overwatered or kept in poor-draining conditions.
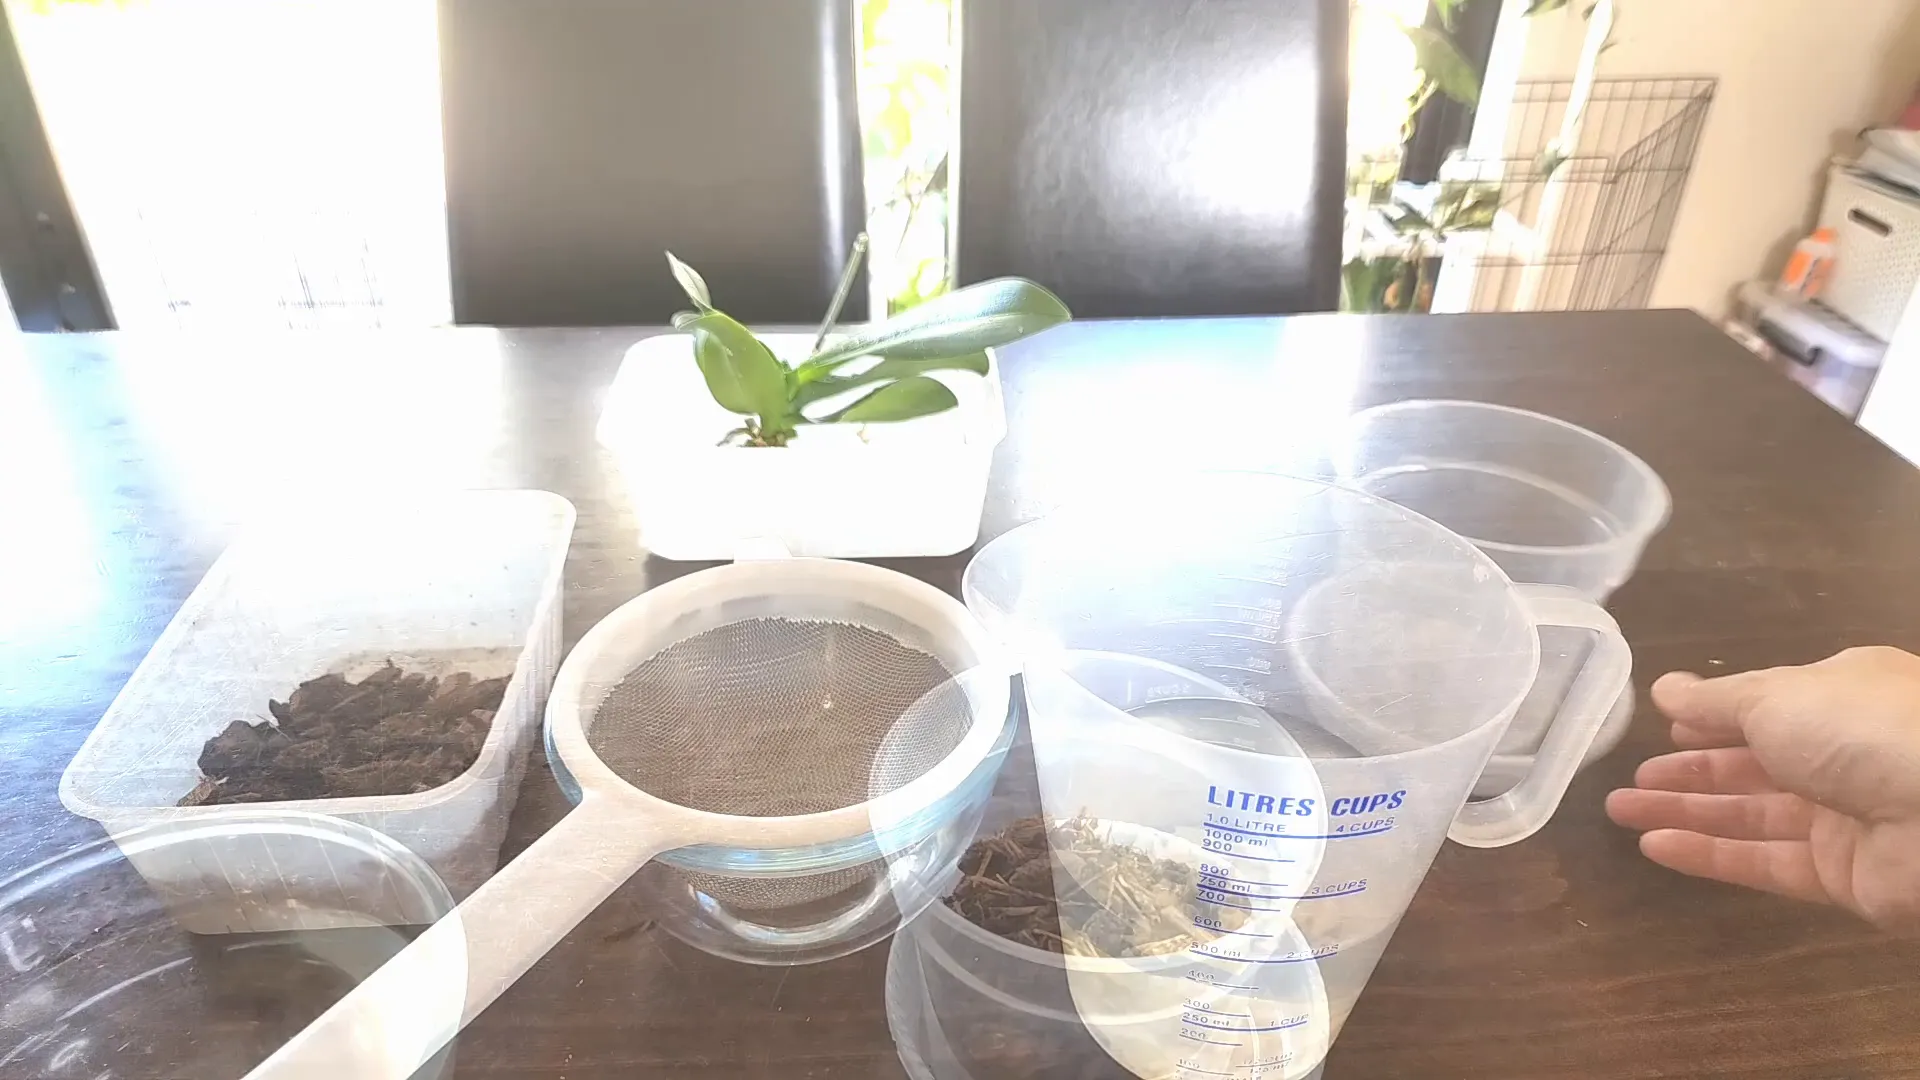
Preparing for Revival: Tools and Cleaning
Before we start reviving the orchid, it’s important to perform an antiseptic cleaning to tackle mold and bacteria. Here’s what you’ll need:
- Sanitized scissors
- Rubbing alcohol for cleaning tools
- A clean container for healthy roots
- Fresh orchid bark mix for repotting
First, sanitize your scissors thoroughly to avoid spreading infections. Then, carefully remove the orchid from its pot and trim away any dead or unhealthy roots—think of this as performing gentle plant surgery. Also, remove any dead flower stems, old flowers, and unhealthy leaves.
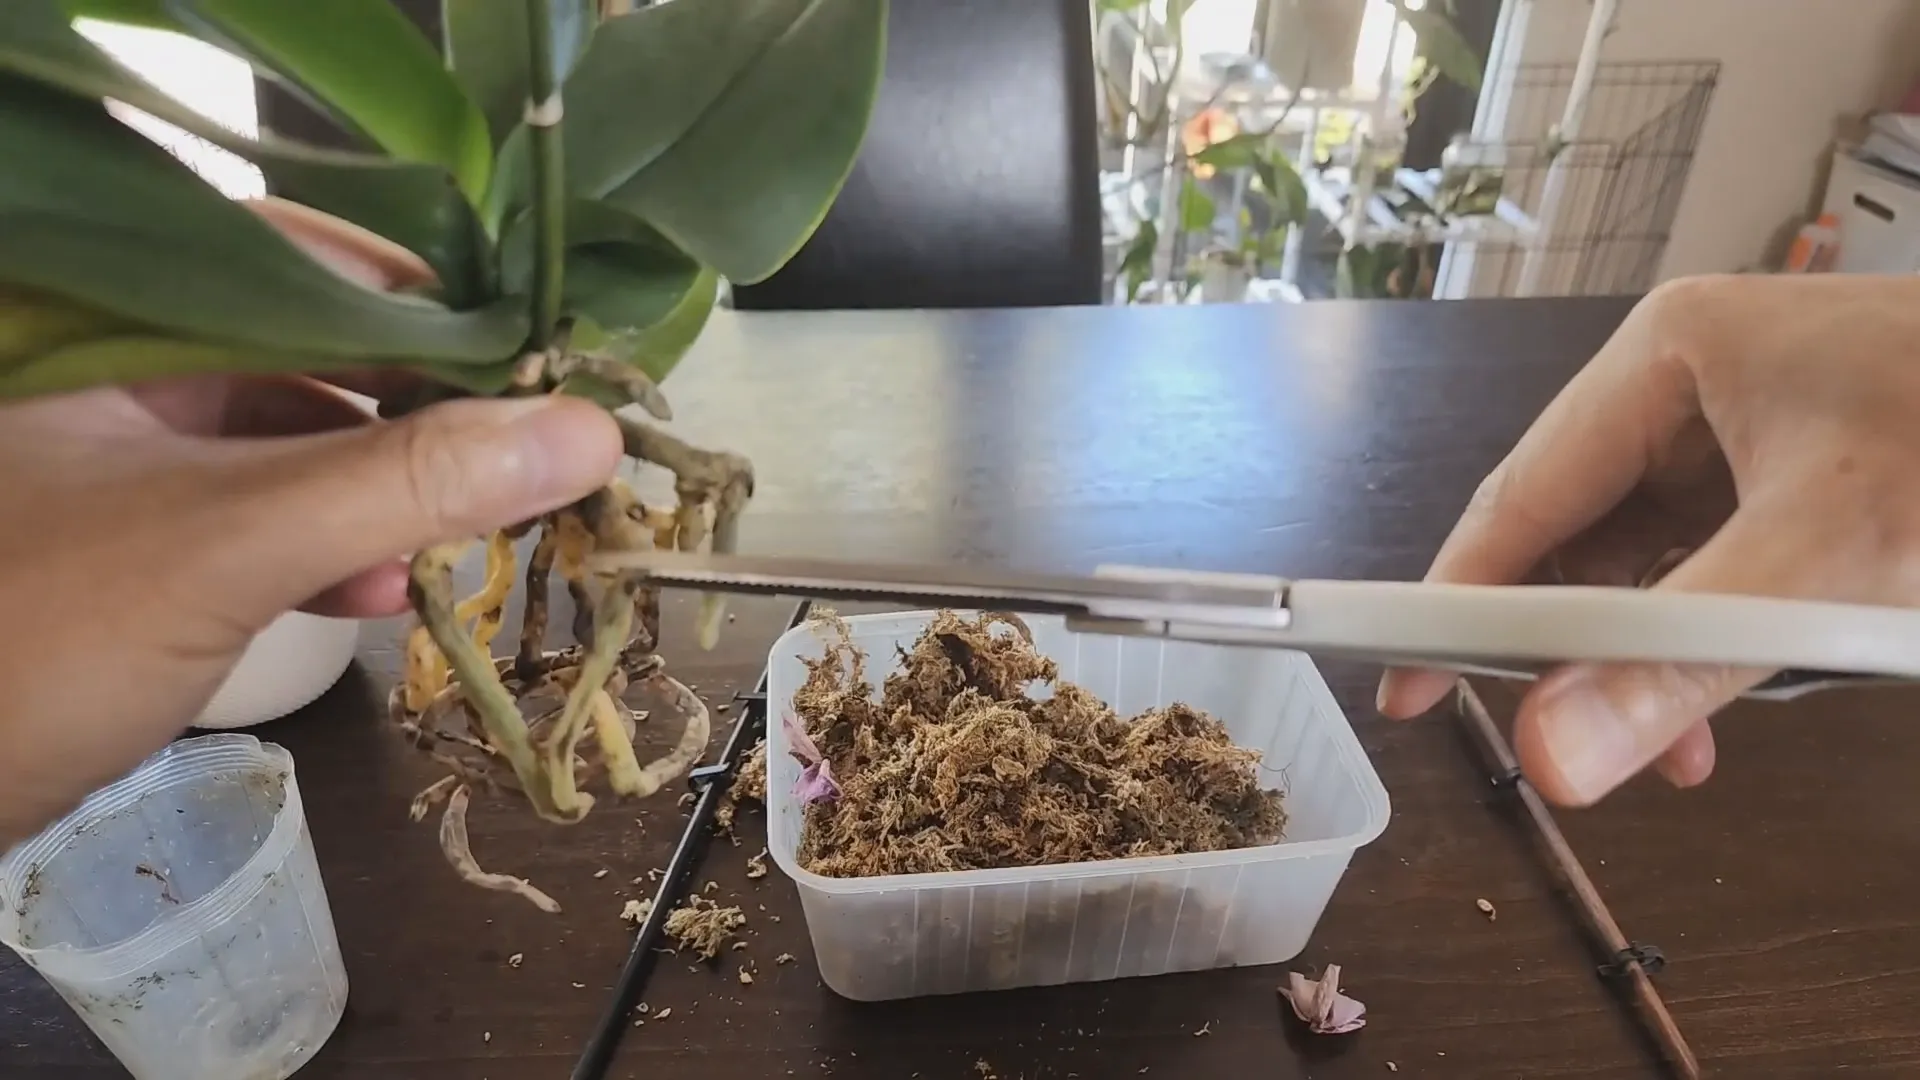
After trimming, rinse the healthy parts of the orchid with lukewarm water to remove debris. This cleaning step helps you assess which roots are viable and ready for repotting.
Making and Using the Garlic Solution
Garlic is a fantastic natural remedy due to its antifungal and pest-repelling properties. To prepare the garlic tonic, you’ll need:
- Two to three cloves of garlic
- Water
- A small container
- A strainer
To unlock the full power of garlic, smash the cloves to release their beneficial compounds. Alternatively, you can slice the cloves and soak them in water. Pour a cup of hot water over the smashed garlic and let it steep. I prefer to leave it overnight, but if you’re short on time, 30 minutes to an hour will also work.

Why Garlic Works Wonders for Orchids
- Antifungal properties: Garlic contains compounds that prevent fungal infections, crucial for combating root rot and leaf fungus.
- Pest repellent: The strong scent of garlic naturally deters many common pests, acting like a protective bodyguard for your orchid.
- Nutrient boost: Garlic can enhance nutrient uptake, giving your orchid an extra kick to thrive.
Repotting with Orchid Bark Mix
Once the garlic solution is ready, it’s time to repot the orchid. I recommend using a pot with plenty of drainage holes—this helps excess water escape and prevents future root rot.
Fill the bottom third of the pot with a soil-orchid bark hybrid mixture, creating a small mound in the center. This shape encourages roots to spread evenly around the mound.
Using orchid bark mix is essential because:
- It offers excellent drainage, preventing waterlogged roots.
- It mimics the orchid’s natural epiphytic environment—orchids naturally grow on other plants, using them for support without harming them.
Because this pot has better drainage, you might need to water and mist your orchid more frequently. However, this approach reduces the risk of bacteria buildup and root rot, making it well worth the extra care.
Applying the Garlic Solution and Aftercare
Water your orchid gently with the garlic tonic, giving it just enough to drink without drowning it. Any excess liquid will drain out through the pot’s holes, preventing water accumulation.
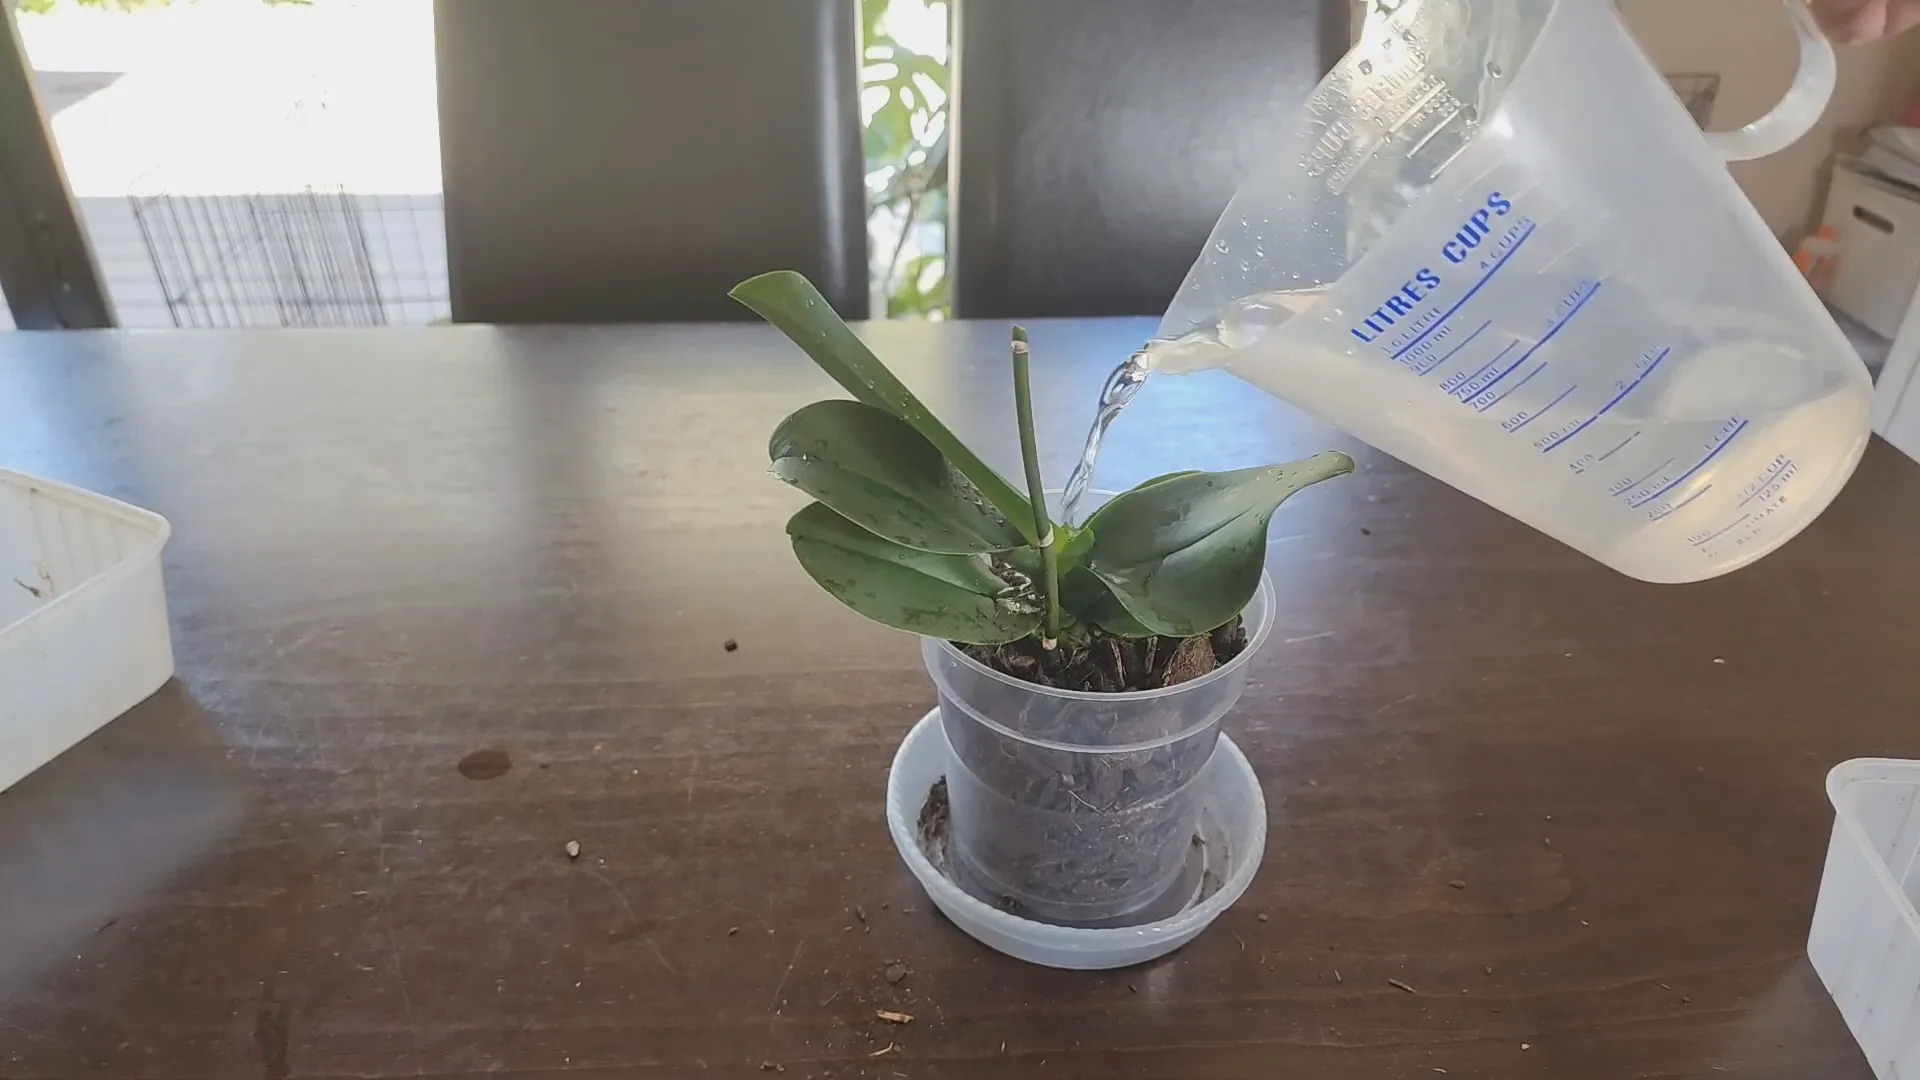
After watering, place your orchid in a spot with bright but indirect light. Keep an eye on moisture levels and mist the orchid every other day to maintain humidity. This mimics natural conditions like rain showers or morning dew, which orchids thrive on.
Don’t worry too much about letting the orchid dry out between waterings—it can survive weeks without water. However, try not to go longer than two to three days without watering if possible.
Final Thoughts and Monitoring Progress
With the garlic treatment applied and the orchid repotted in a more suitable environment, the hardest part is waiting and monitoring. I’m excited to see how this orchid responds to the care and natural garlic tonic over the coming weeks.
Regularly check the orchid for new growth, healthy roots, and vibrant leaves. If you notice improvements, it’s a sign the garlic tonic and repotting method are working their magic.
Give your orchid the love and patience it deserves, and you might just bring your green friend back to life with this easy, natural method!
Happy planting and don’t forget: sometimes, a little garlic goes a long way to saving your orchids!